easy snowflake gift wrapping

This week you will be seeing a bunch of pretty gift wrap ideas for your holiday presents here on Circus Berry.  Today, it is all about simple.  So, do you want to dress up a present with practically no effort at all?

gift-wrapped-snowflake

Here is what you do.  Grab a roll of solid wrapping paper.  Buy a package of snowflake ornaments (I got mine at Home Depot…less than 3 dollars for a package of twenty).  Then grab some thin silk ribbon in a coordinating color.  Oh, and don’t forget your simple circle tag.

easy-snowflake-gift-wrap

Wrap your present all neat.  Put a snowflake in the middle…or the side, or the corner.  Wrap the ribbon around a couple of times and finish with a square knot.

gift-wrap-with-snowflake

Then stick your tag under some of the ribbon.

chirstmas-gift-wrap-with-snowflake

Isn’t that so simple and pretty?

snowflake-ornament-wrap

If you are unfamiliar with a square knot or how to tie one, check out the “How to Tie a Knot” tutorial on Paper Source.  You will have it in no time!

Happy Wrapping!

Signature

life in general {getting the tree}

We are one of those families that still like the real tree.  Sure it is a bit messy, and sure it probably costs more in the long run…but part of the fun of the season for now is going to get the tree.  Let’s not forget that great pine smell that fills the house.  Until we find out that it is just too much of a pain, or that one of the kids is allergic, real it is.

We went to get the tree this weekend, to the same spot we have gone to for years.  Of course I couldn’t pass up an opportunity to snap some shots of the kids while we were there.

baby-girl-going-to-get-the-treeronan-lets-me-take-a-picturemiss-moirapicking-a-treerunning-through-the-treesfinding-the-perfect-tree

With all of those rows and rows of trees, the babies could not resist running around.  We finally agreed (meaning: I decided) on a tall, full, but skinnier tree.  I just love the way they look all decked out.  Do you have a tree preference?  Real or fake?  Tall and skinny, huge, or pleasantly plump?

Signature

gift wrap inspiration: 10 ways to pretty your presents

Last weekend I had the great opportunity to work with Tiny Prints on a little gift-wrap party at my house. I will be sharing the event and all of the details this week, along with some great gift wrap ideas courtesy of a few fabulous and talented contributors. To kick off this week of wrap, I thought I’d share some ideas to get you inspired.

pretty-presents

Check it out some of these fun ways to pretty your presents!

fabric scrap wrap

Use scrap fabrics around plain paper for a fun ribbon substitute. (via C.R.A.F.T.)

lowes gift wrap

Make a trip to the hardware store for some clever gift trim. (via Lowes)

paper embelished gift wrap

I love all of these ways to add paper embellishments to gifts! (via Damask Love)

white wrapping ideas

Don’t be afraid to be elaborate…or monochromatic.  These would be perfect for your White Christmas. (via Style Me Pretty)

washi wrap

I love washi tape and love the way these gifts turned out…so many possibilities! (via The Sweetest Occasion)

rustic gift wrap

Plain kraft paper doesn’t look so plain anymore when decorated with some adhesive card stock. (via I Dig Pinterest)

Let’s not forget the impact of some flashy gift tags…

chalkboard gift tags

Tags, wrapping paper, and sign printable via The Creativity Exchange

printable gift tag

Printable gift tags via Elegance & Enchantment

coaster tags

Monogram coaster and ornament printables via Tatertots & Jello

Lastly, check out all of the ways you can tie a bow…

handmade bows

there are 25 of them on A Subtle Revelry.

Aren’t all of these beautiful?  I hope you found some inspiration for your own gifts.  Stay tuned this week for more gift wrap fun!

Signature

christmas decorating with vintage finds

Almost every time I go to visit my mother in Central New York, we make our obligatory stop at this fabulous Antique Barn in her area. The place is filled with all sorts of findings and we spend hours looking at furniture and pawing through tchotchkes, dishes, clothing…stuff. I almost always walk out with something.

On our last visit there, I picked out a handful of items that I intended to use for a cute vintage Christmas vignette. When mixed in with some items I already had (from that Antique Barn), I was able to get something a little bit vintage, a little bit a simple, and a lot of merry.

vintage-christmas-vignetteornament-filled-bowlvintage-finds-for-christmaschristmas-table-with-vintage-findsvintage-christmas-finds

The “merry” blocks, the adorable brass deer set, the record, and the books all came from that day.  The bowl was acquired on a different trip from that same shop.

vintage-bowl-with-redvintage-christmas-entrychristmas-vignette-with-vintage-findsvintage-merryvintage-christmas-deer

I don’t typically do all-vintage, but once I saw these great items I decided to just go with it.  I was so excited to try out something a little out of my ‘zone’ and am happy with the results!Signature

Linking it Up:
The Merriest Blog Hop
Gingerly Made
Christmas Wonderful Link Party
A Handmade Holiday Link Party
Link Party Palooza
The Party Bunch

bread machine cinnamon rolls

If you have overnight guests coming this holiday, consider making these to enjoy over some morning coffee and conversation.

bread-machine-cinnamon-rolls

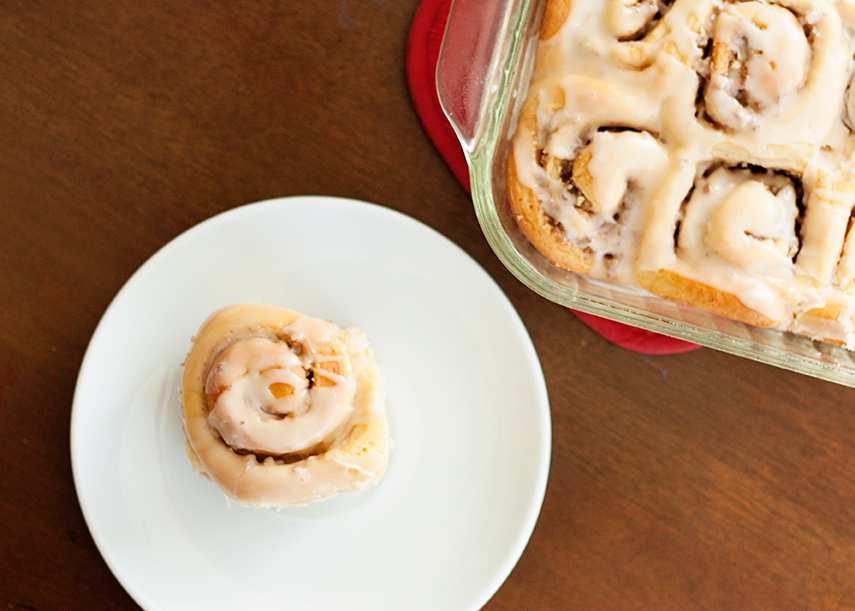
We bought a bread machine a couple of years ago, and at that time I went on a sort-of bread machine bender.  One of my favorite things to come out of the bread machine was these cinnamon rolls.  They are just so good, I decided to make them for Thanksgiving morning.  They were the perfect match for some coffee and the Macy’s Thanksgiving Day Parade.

cinnamon-bun

I found the recipe online a while back and have changed it to suit my needs.  You can make this breakfast treat the morning of; however, I prefer to have them ready to heat up in the oven in the morning.

Bread Machine Cinnamon Rolls

Dough:
3/4 cup milk
1 egg, lightly beaten
2 teaspoons vanilla extract
3 cups all-purpose flour
6 tablespoons sugar
1/4 cup unsalted butter, softened
1 teaspoon kosher salt
1 3/4 plus 1/8 teaspoon bread machine yeast
Filling:
1/4 cup unsalted butter, melted
1/3 cup brown sugar
1 teaspoon cinnamon
1/2 cup finely chopped pecans
Icing:
3 tablespoons butter
1 teaspoon vanilla extract
3 tablespoons hot water
2 cups confectioners’ sugar

Add ingredients for dough to the bread pan of your bread machine in the order listed, and set on the “dough” cycle. Once completed, turn the dough out on a lightly floured surface. Roll into a 10×18 inch rectangle. Brush the entire surface with melted butter. Mix together the brown sugar and cinnamon and sprinkle across surface of dough. Repeat with pecans. Start at one long end and gently roll the dough, pinching the seams together at the long end. Use a very sharp knife to cut the roll into one-inch pieces. Place pieces, cut side up in a greased 9×13 pan. Cover the pan with a slightly damped towel and place in a warm spot to rise for about 45 minutes.

Preheat oven to 300º. Bake for about 15 to 20 minutes until set but not brown. Remove from the oven, cool, and cover.

When ready to serve, preheat oven to 375º. Bake the rolls, uncovered, for about 10 minutes until lightly browned. To prepare icing, melt butter in a small sauce pan. Stir in vanilla and hot water and remove from heat. Whisk in confectioners’ sugar. Drizzle the icing over the warm rolls. Allow to cool slightly, then serve. These are best enjoyed the day they are made.

cinnamon-roll cinnamon-rolls

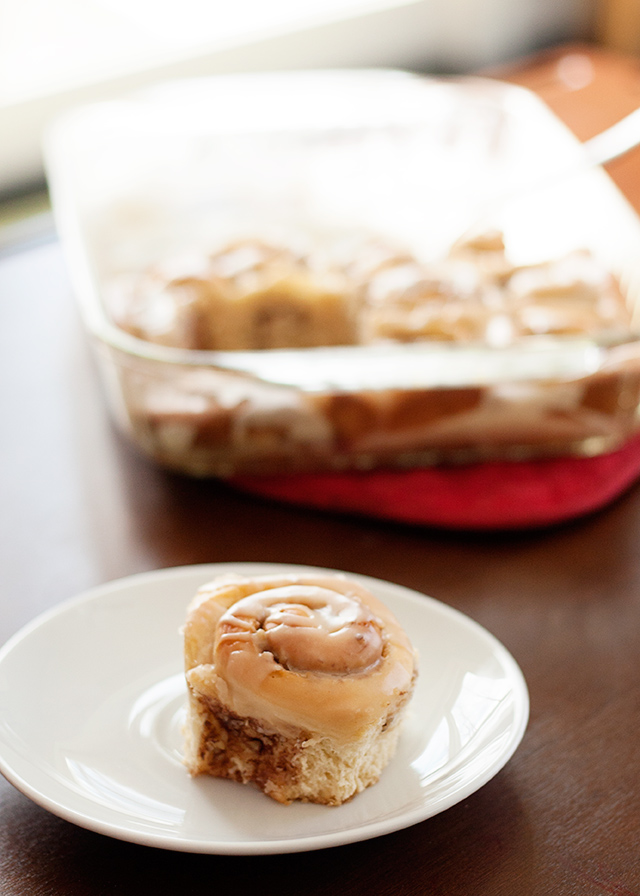
Beware how good these are.  You will find yourself eating half the pan if you are like me!  Enjoy!Signature

Linking it Up:
Craft Frenzy Friday
Lemon Paper Designs
Pinworthy Projects
Serenity Now
Or So She Says
Link Party Palooza
Super Saturday Link Party
Serenity You